Home
Add new employee wizard
Introduction
The following are the quick steps in creating a new employee.
You must use the new employee wizard to create the initial employee details, following which you may use the various employee management windows to change an employee data.
|
Getting There:
[ Nav ] –> Wizards / Add Employee
|
- On the main navigator screen, double click “wizards”
- Double click “Add Employee”
- Click “Ok” to employee space notification - indicating the available new employee count for your licence.
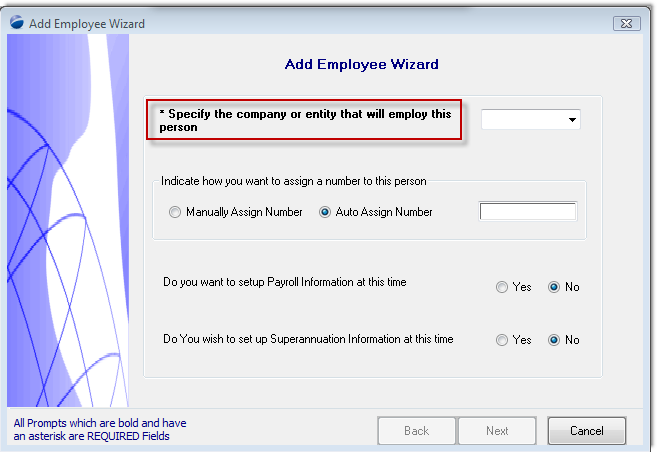
- Select your company (if more than one) as the default should be the company you’re logged into. Use the drop down menu otherwise to select your correct company.
- Leave on “Auto Assign Number” unless it’s a subcontract guard, if so refer to Adding Sub Contractor Employees section (below)
- Select “Yes” for setup payroll information and “Yes” for superannuation information if you have the employee's superannuation and payroll information at hand to enter now. Otherwise leave the options at No, and complete these details later.
- Note: You need only enter the fields highlighted and signified with a "*" to get the minimum required details for a new employee.
- Fill out “Title” and “Marital Status”
- Ensure gender is correct – Male/Female.
- Click next (once you'completed this and form, and similarly for each other form following)
- Complete all address information – state and post code may be auto generated
- Use drop downs to select “Country/Citizenship/Nationality”. The system requires the use of dropdowns to validate your input.
- Click next to move onto the next form. You may at any stage also press the Back button if you wish to go back to a previous form - the information that you've entered to date will not be lost.
- Double click on the first cell under “Contact” field
- Select type of contact – mobile, office, home… etc. See setting contact details for further information.
- Ensure all contact details include area codes – for landlines use the format “02” a space then the number
- When entering mobile numbers – do not place any spaces in number – eg 0412751111.
- Enter “next of kin” details if you have them available.
- Click next.
- Date of employment should be the same date as the date on the employees Tax File Declaration form
- Review date is the same as employment date plus three whole months (the probation period).
- Use the dropdown to select the type of employment. Do not enter free-form data into this field.
- Select appropriately from the drop down.
- Disregard “Default Cost Centre” at this stage
- Click next.
- Licence Details:
- Double click on the first cell under “licence” field
- Select type of licence – 1A/1C, SFA… etc.
- Enter the licence number without spaces
- Enter the expiry date
- Repeat the same licence process for each licence sub class and other licence.
PowerForce treats a First Aid Certificate as a licence. The licence number is the certificate number
- Skill Details:
- Double click on the first cell under “skill” field
- Use the dropdown to Select type of licence – RSA/Certificate… etc.
- Enter the attained date
- Enter the certificate number in the comment field with the name prior to certificate number. For example – “STAT – 1223”
- Repeat the same skill detail process for each skill/certificate.
- Disregard “Specific Soles” and “Specific Areas”
- Click next
- Use the drop down on pay cycle to select available options.
- Change “Pay Method” to “Electronic”.
- Enter BSB with a “-“ between the 3rd and 4th number (BSB should always be six digits long). The BSB is the bank sub-branch number which the employee should provide.
- Enter the bank account number without spaces
- Enter the bank account name
- Click next
- Enter the Tax File Number without spaces.
- “Tax Waiver Date” is the date of tax file declaration form. If signifies the date at which the system will commence to deduct the maximum payroll tax if the tax file number details are not defined in the system.
- “Tax table” is “02” from drop down box if they have answered “yes” on question 9 on tax file declaration form and “01” if they answered “no”. If no tax file number supplied, select “ntfn”.
- Tick “authority to give TFN to superannuation”.
- Tick “Australian resident for tax purposes” for everyone
- Tick “Tax Free Threshold claimed” is they answered “yes” on question 9 on tax file declaration form only.
- Disregard the rest of the input fields
- Click next
- Use the dropdown to select the name of the superannuation fund for “company contribution”
- Disregard rest of fields
- Click next
- Click Finish. At this stage the system will notify you that the data has been entered successfully.
Note new employee number on employment forms and you’re done
See Also
 PowerForce Controls PowerForce Controls
|