Home
Standard Scheudules
Introduction
The term standard schedules refers to the repetitive shifts for a particular location, the week in, week out rosters.
|
Getting There:
[ SC ] –> Modules / Module Options
|
Introduction
Standard schedules can only be created on the back of a client work schedule. The article relating to the SACL example has an excellent writeup on defining a work schedule, you'll find it here.
Using the scheduling workbench
Standard Schedules
This allows you to assign employees to shifts forming a schedule template. The template is then used to generate the same roster as many times as is needed.
This feature is ideal for maintaining low maintenance repeating schedules.
Workbench
Use the “Scheduling Workbench” to create schedules based on client (bar, kitchen, restaurant, bistro, etc) details or to define client details from scratch.
This window also allows you to directly edit individual shifts that have been generated from Maintain Standard Schedules.
Maintain Standard Schedules
Outcome: Explain where in the window it indicates hours allocated to an employee
Describe where in the window it indicates the shift hours
This window uses the data collected in the Client Work Schedules window and displays it as a series of un-allocated shifts. Employees are then assigned to shifts creating an employee schedule template structure that is used to generate employee schedules over and over, rather than assigning employees to schedules every week.
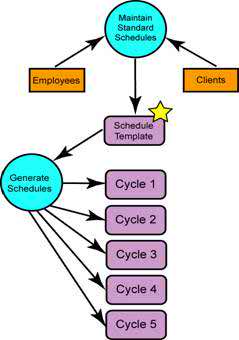
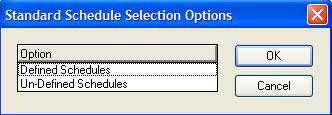
ADD ALL SCREEN SHOTS – DEFINED / UNDEFINED
|

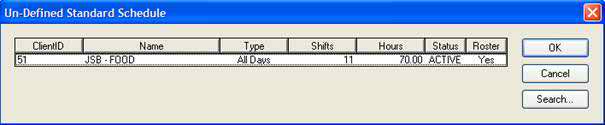

Let’s first have a review of all the valuable information that is presented on this screen. This window uses the data collected in the Client Work Schedule window and displays it as a series of un-allocated shifts. Employees are then assigned to shifts creating an employee schedule template structure that is used to generate employee schedules over and over, rather than assigning employees to schedules every week.
The client work schedule requires 34 shifts to be filled, for a total of 204 hours.
Note: When the window is opened, shift definitions are displayed; these are not part of the template. It is only when employees are assigned shifts that a template is constructed.
Let’s draw your attention to the grey line across 9AM1/Chef. We’ll be referencing the gray in this tutorial, so please note its significance. It is the delimiter between the staff that you’ve allocated to the available shifts and the yet to be assigned shifts on / below the gray line.
The goal here is to assign your employees to the client work schedule (the available shifts). Once you assign the employee to the shift, we then call this a “Work Schedule Template”, and its this template that you manipulate over and over to create your forward planned shifts.
Double click on the grey line, to bring you to the following window
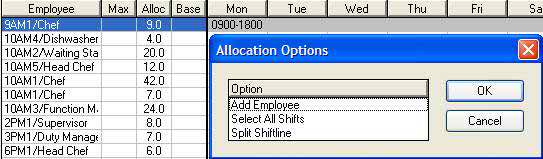
You’re now in a position to start to add employees to the Work Schedules.
We’ll select the employees from the XXXXXXXXXXXXXX, as below
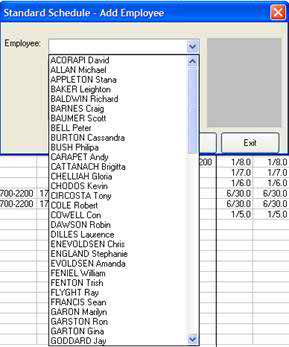
Select the first entry, which moves you along to:
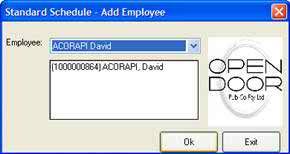
Your screen will now look as below:

David is now above the gray line, which as we mentioned previously is the delimiter between employee and available shifts.
Now, select the shifts that you wish to assign to David, click on each shift in turn.
Click on David to select the employee, to the screen as below:

Press the “Assign” button to achieve the following:

What you have now is a list of shifts assigned to David, and the entry for 10AM2/Waiting Staff is now no longer below the grey line.
You realise that you’ve made a mistake to assign David the Wed shift, so select the “Wed” shift and click Un-Assign, to remove the shift from David.


Let’s pause to demonstrate a few miscellaneous features. Select an employee name in the “Employee” column, double click to bring up the Allocation Options popup. Select “Split Shiftline”,
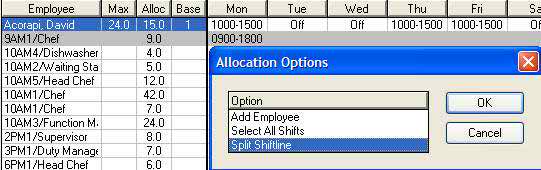

EXAMPLE OF HOW / WHY SPLIT SHIFT
|
Before moving on, make a note of the information being provided as you allocate shifts to employees. David has a total of 15.0 hours allocated out of a total of 24.0 which are defined as his maximum weekly allocation. The 24 comes from this award classification, which states that he ideally should only work 24 hours per week. You may of course allocate more hours, and we’ll review this later.
Allocate another employee to the list of employees to arrive at the following screen:

You realise that you’ve selected Michael by mistake. To remove Michael from the list of employees, do not assign any shifts to him. When you save the Standard Schedule, the system will realise that Michael has no shifts allocated and Michael will not appear on this list.
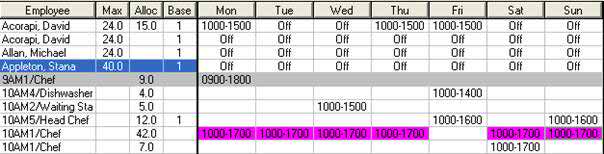
We’ve moved forward to assign Stana, and selected the 10AM1/Chef Schedule. Stana in her classification is Full-Time and a weekly Max hours value of 40.
Let’s move forward and assign the various available shifts to employees. For the purpose of this tutorial, allocate emplolyees one after the other from the popdown list.

We’ve progressed through the work, so let’s save our work before proceeding. As we’ve mentioned above, Michael Allan has now been removed from the Employee list, and your Standard Schedule workbench should look as below:

Again, some interesting detail from the display. Note on the right hand side, the column titled Shift/Hrs.
- David Acorapi has been allocated 3 shifts for a total of 15.0 hours.
- Stana Appleton has been allocated for 6 shifts, for a total of 42.0 hours. The colums is in red, because Stana has an award definition of 40.0 hours Max per week, and the hours allocated total 42.0.
SCENARIO – you’ve been running this Client Standard Schedule for a couple of weeks / months, and staff leave, as they do. How do you replace the employees?
|
Select Craig Barnes, double click on his name, to bring up the Allocation Options popup.
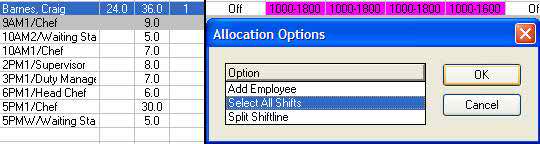
Select “Select All Shifts”.
Select “Un-Assign” to remove the shift allocations from Craig.

Craig still remains on the list of employees, and recall that to remove Craig, as soon as you select “Save”, his entry will be removed.
The reason why we chose “Select All Shifts” is in the case of a multi-week roster, where the weeks following this one being viewed are not visible, the select all shifts ensures that all the shifts allocated to Craig are selected in the one action.
Before finishing this tutorial, here’s a quick overview of the various fields on the screen that we’ve accepted as default.
Fields to Note
|
Schedule Type
|
This refers to the type of day the schedule affects, “All” – Every day of the year. “Regular” – all days, except public holidays. “Phols” shifts for public holidays only.
|
View
|
Determine whether a shift is shown as “Times”, “Hours”, ”Shift Code” or “Role”.
|
Last Rotation Week Ending Date
|
This is the date of the last day, in the last generated rotation. This value is used in conjunction with Last Rotated Cycle to identify what is the next rotation to be generated in the roster.
|
Rotation
|
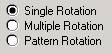
These fields allow shifts to be based on “Single Rotation” (single week), “Multiple Rotations” (changing rotations over multiple weeks) or “Pattern Rotation” (multiple weeks based on a defined rotation pattern).
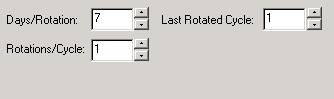
When “Multiple Rotation” is selected these additional options are displayed in the top right of the window.
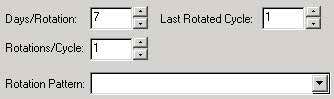
Selecting “Pattern Rotation” adds the “Rotation Pattern” list box. This allows you to select from the rotation patterns you have designed.
|

|
Click this button to remove all employee information from the schedule, thus removing the schedule template. You can still open the window again and see the shift definitions as these are not the template but data read straight from the client files.
|
This completes our introduction the the Client Scheduling workbench.
Summary Tab
1. This display is divided into 3 related sections
A. Employees
B. Days
C. General Information
Employee Section
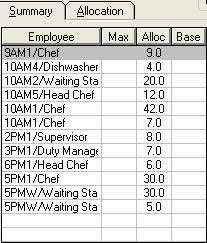
1. This shows the employees used in this template and the shifts names still to be allocated
Fields to Note
|
Max
|
The maximum hours available for this employee to work, without going into overtime, over all the rotations of the cycle.
|
Allc
|
This is the number of hours allocated to the employee or the shift over all rotations in the cycle.
|
Base
|
When a pattern rotation is used this number indicates which rotation of the pattern is the starting point for the employee.
|
Double Click 8 in the Employee Column.
|
This allows the user to:
“Add an Employee” – an employee is added to the display allowing shifts to be allocated to that person.
“Select all shifts” – all shifts of the highlighted shift type will be selected, preparing them to be allocated to an employee.
“Split Shiftline” – the highlighted employee will be duplicated, allowing multiple shifts or split shifts to be assigned on the same day.
|
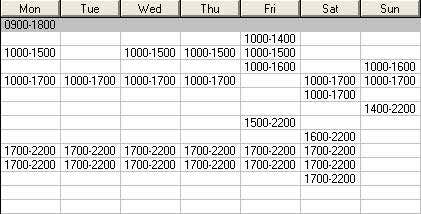
Days
1. This display shows the shift type for the day of the week.
General Information
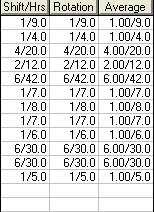
1. This display shows the hours to shifts ratio
Fields to Note
|
Shift/Hrs
|
The number of shifts / total hours allocated in the current rotation.
|
Rotation
|
As for “Shift/Hrs” except for all rotations.
|
Average
|
As for “Shift/Hrs” except averaged over all rotations.
|
Note: If the “Rotation Selection” buttons  are used the “General Information” display resets to “Shift/Hrs”. are used the “General Information” display resets to “Shift/Hrs”.
Allocation Tab
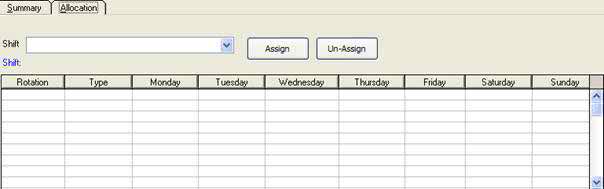
1. This view shows all the shifts allocated to the person highlighted in the “Summary Tab”
Note: Allocated shifts are shown as time ranges eg “1545‑0000”, unallocated shifts are shown as descriptions.
Fields to Note
|
Shift
|
Select a “Shift” from the list box and then double click the desired day of a rotation and that shift will be applied, or if already applied, it will be cleared.
|
Rotation
|
This is the rotation within the cycle.
|
Practice
Outcome: Demonstrate how to set the rotations per cycle
Show how to add an employee to a standard schedule
Demonstrate how to assign an employee to a shift
For our practice we will assign 3 employees to work a 3-week cycle with each employee working a week on days, afternoons and nights.
1. In the Navigator click “Scheduling”
2. In the right pane double click “Maintain Standard Schedules”

3. In the “Client Code” field enter “POW-SA” and press “Tab”
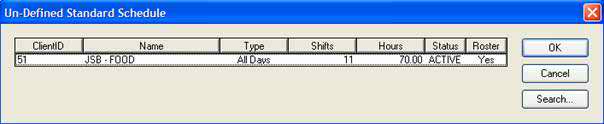

4. Click “Multiple Rotation”
A. The fields “Days / Rotation”, “Rotations / Cycle” and “Last Rotated Cycle” will now be displayed

5. Change “Rotations / Cycle” to 3
A. This allows and employee to rotate through Days, Afternoons and Nights.
6. Change “Last Rotated Cycle” to 3
A. This indicates the last rotation generated as a roster was rotation 3 of 3, so the next to be generated will be 1 of 3.
7. Click Save
A. The window will now close
B. Open the window again for “51”
C. The bottom left corner will now say “Rotation 1 of 3”

- Double click in the first blank row in the “Employee” column
-
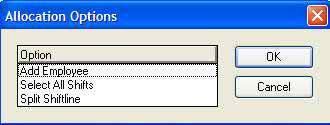
9. Double click “Add Employee”
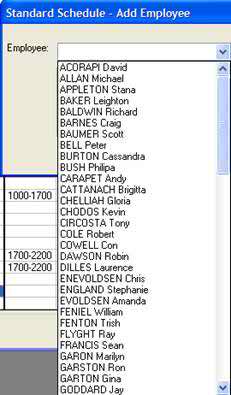
10. Click the down arrow for a list of employees
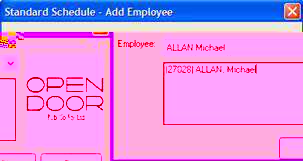
11. Select Brown John from the list and then click Ok
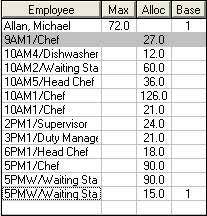
12. “Brown, John” has now been added to the employee list


CREATE A SET OF SHIFTS ACROSS A 3 WEEK ROTATION
|
13. Click each of the 5 “NI” shifts (row 2)
14. Click the right arrow at the bottom left of the window to show the second week in the schedule cycle

15. For the second week click all the DAY shifts (row 3)
16. Click the right arrow at the bottom left of the window to show the third week in the schedule cycle

17. For the third week select all the AFT shifts (row 4)
18. Click “Brown, John”
19. Click the Assign button
20. John Brown has now been assigned to
A. Week 1 as Nights
B. Week 2 as Days
C. Week 3 as Afternoons
21. This can be checked by
A. Click “Brown, John”
B. Click the “Allocation” tab
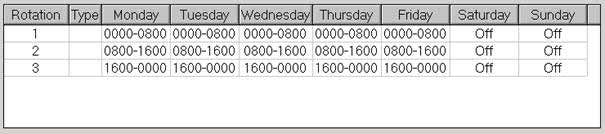
21. Repeat this process for another 2 employees
A. Select from the remaining shifts
B. Employees “Debbie Lithgow” and “William Stevens” are available to schedule
22. Click Save when finished
ADD SPLIT SHIFT SCENARIO HERE
|
Changing the view(s)
XX
Month to date processing
XX
Top of Page
See Also
 PowerForce Controls PowerForce Controls
|