The employee wizard is the only method available to enter new employees into the system.
The “Employee Wizard” will prompt you for all the required details necessary to construct an employee record.
1. Select “Wizards” in the lower part of the left navigator view
2. Double click “Add Employee”

Figure 1 - Starting the add new employees wizard
Fields to Note
|
Company or Entity
|
Select the name of the organisation that will be used to pay the employee (your Company). The value will default to the current company.
|
Manually Assign Number
|
Check this option to enter your own employee number. If not checked the system will assign an employee number automatically.
|
Setup Payroll
|
At the end of the wizard an additional 2 windows will be displayed prompting you for information about Pay Cycles, Account codes and Tax file information for the employee.
|
Setup Superannuation
|
At the end of the wizard an additional window will allow you to setup company and employee superannuation payment details.
|
- Complete the fields as per the example and click the Next button to continue completing the wizard

Figure 2 - Entering employee data
Fields to Note
|
Preferred Name
|
A name such as a nickname or an abbreviation that the employee prefers to use.
|
Former Name
|
The name the employee used before their current name.
|
Previous Name
|
The name the employee used before their former name.
|
- Complete the fields as per the example and click the Next button to continue completing the wizard
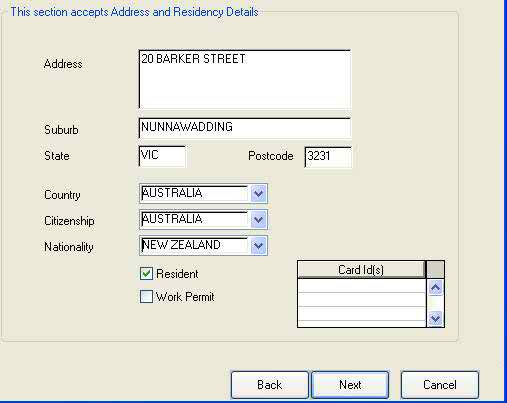
Figure 3 - Address details
- Complete the fields as per the example and click the Next button to continue completing the wizard
- Double click the “Contact” to display a list of available contacts types
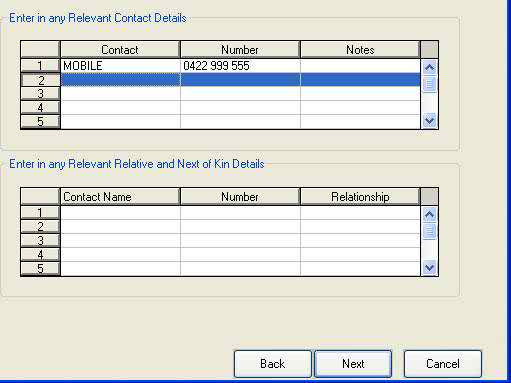
Figure 4 - Example of Contact Details fields
- Complete the fields as per the example and click the Next button to continue completing the wizard
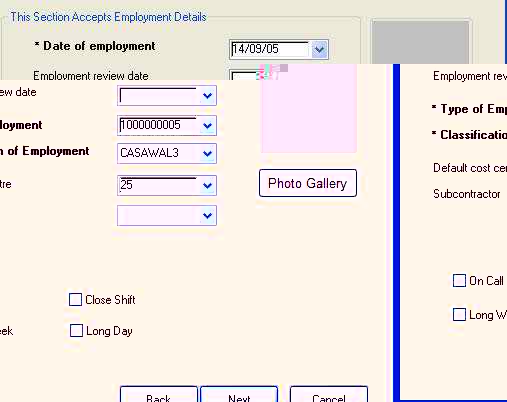
Figure 5 - Pay details for the employee
Fields to Note
|
|
|
On Call
|
The employee is available to be called up to do additional work.
|
Long Week
|
The employee is prepared to work additional days in a week.
|
Close Shift
|
The employee will work until the client decides that the business is closed for the day.
|
Long Day
|
The employee is prepared to work additional hours in a day.
|
- Complete the fields as per the example and click the Next button to continue completing the wizard

Figure 6 - Completing the skills matrix
- Complete the fields as per the example and click the Next button to continue completing the wizard
Fields to Note
|
Licence
|
Required training for a position. Typically the training must be reviewed or renewed at regular intervals.
|
Skills
|
Required training that does not expire.
|
Role Code
|
The type of work the employee can perform.
|
Location
|
Preferred work area(s). Geographical locations within the company’s customer base.
|
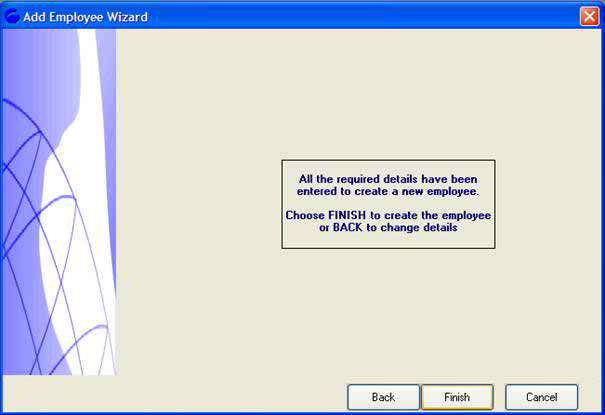
Figure 7 - Finishing the employee wizard
- Click the Finish button to create the employee

Figure 8 - Confirmation of completion
Top of Page
See Also 
 PowerForce Controls