Home


Introduction
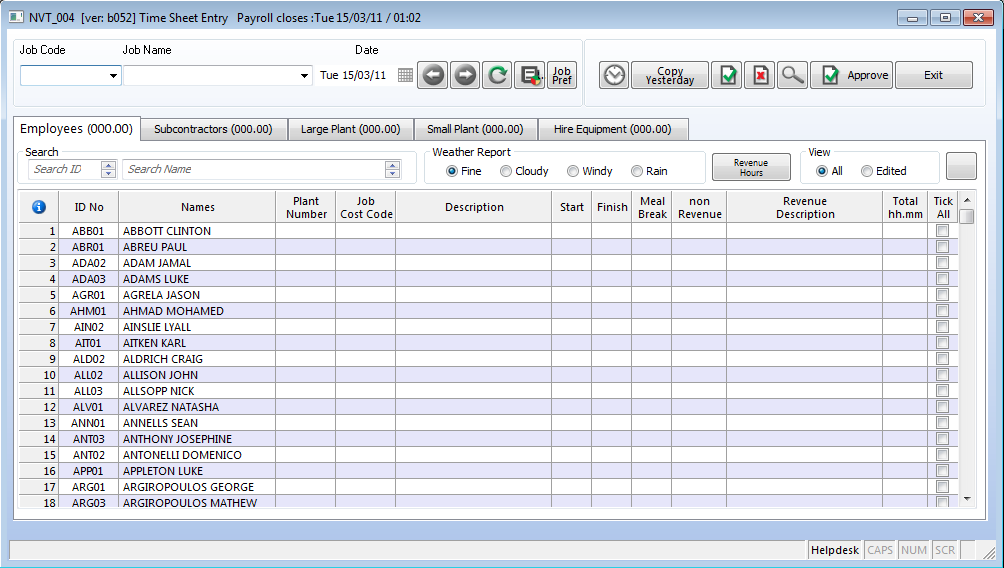
When you open the timesheet entry for the first time each tab of the screen will list all of the related information in the system. That is, it will show you all of the emloyees, all of the sub-contractors and equipment available.
This is because the system has no preferences set for your login id, until the preferences are created by the user. When you do create the employees and equipment for a site, the selection is valid only for that login id.
|
|
Overview
This image is indicative of how the timesheet entry displays with no user preferences set.
Setting personal preference lists
The following are the preferences which need to be set so that the timesheet entry does not present you with the complete list of all employees and equipment.
- Job preferences
- Georgiou Employees
- Sub-contractors (this generally referes to the sub-contractor company rather than individual employees of the sub-contractor).
- Georgiou Large plant
- Georgiou Small plant
- Hire equipment
Top of Page
Setting preferences
Preferences are set from the following buttons.

- To set your Job preferences, press the Job Pref button which will show you the image as per the section below.
- To set any other preferences, once you are on the correct tab for which you wish to make preference changes, press the magnifying glass button as per the section below.
Top of Page
Setting Job Preferences
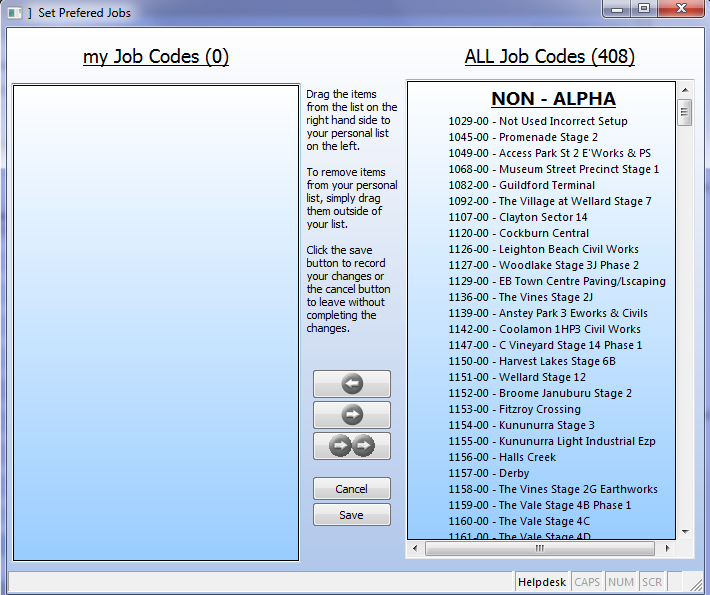
The first preference selection that you need to make is the job preferences to indicate which jobs you are responsible for. Pressing the "Job Pref" button will present the following screen. However, before you do that, take note of the Job Code & Job Name fields in the image above (they are both blank).
In the image below, you can see that the system is telling you "my Job Codes (0)", and ALL (408). To select your job, scroll down on the right hand column to locate your job code, select it (one or more). Then either using the left arrow button, or dragging the selection across to the left hand side area, will move the entry to what will become your job code preference.
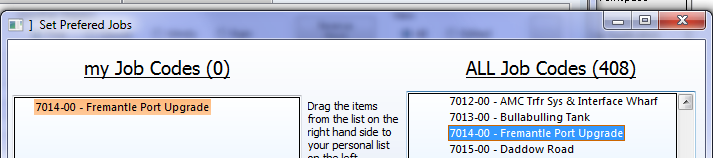
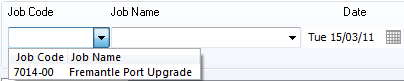
Press the "Save" button to make this a permanent change. The screen will close and return you to the timesheet entry screen, where you may select the Job Code for use in data entry for the '15/03/11'. When you use this screen in future with the same login id as this entry was created by (GO7014 in this example), you will get the preferences that are set here.
Top of Page
Setting any other Preferences
Having set the Job code preferences, you may then do the same for employees and equipment.
Note, that you do not need to make all your preference settings prior to using the timesheet entry, it helps to limit the amount of information that displays on your screen. In this example, we've selected multiple entries and are using the drag & drop to move them to our permanent equipment selection.
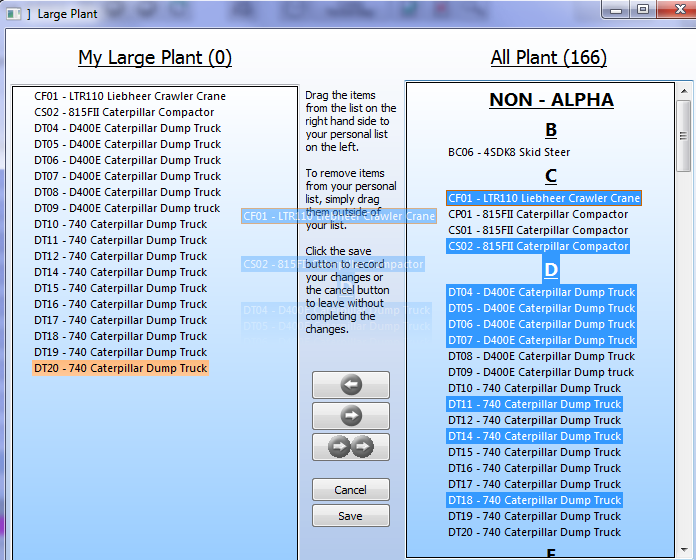
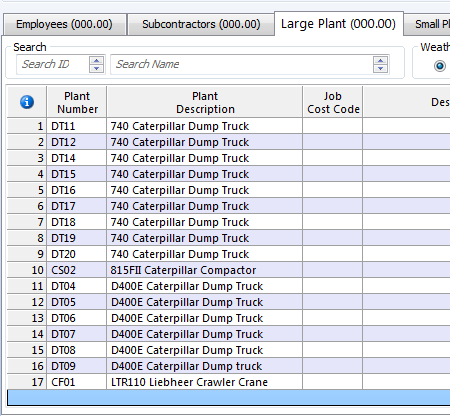
Press "Save" to make a permanent change to your selection. The tab now shows only the preferences saved above, and this list is all that will display for timesheet entry until you make further changes.
Top of Page
Changing / Removing preferences
To add / remove preference setting, simply follow the above process in reverse. You may use the same drag & drop technique or use the double arrow button to remove all preferences. The changes are made immediate when you save your selection.
See Also
 Timesheet Project Requirements Timesheet Project Requirements
TimeSheet Entry (Daily Workplace Report)
Top of Page

Article updated by PowerForce Software on Monday, October 25, 2010.
Copyright ©2007-2013 Envizion Systems - All Rights Reserved - Terms of Use.
|